Sunday, December 30, 2007
Flight engineers delight
Looks better than before....
Christmas vacation, time to.... to make old scrap look like new! Remember the sad appearance of the flight engineer desk? Well just look at the older pictures. A bit of paint and a bit of polish and of course a loooooot of time and patience.
It was like always when I started the renovation on a big part. First I had the feeling that it will never come to an end, and in fact I had no idea how to solve certain problems. The missing parts for example, how am I supposed to replace them? But like always, solutions come while working. A bit of sheet metal here some aluminum profiles there.... and here we are.
If I'm looking back now, it seems it never was a problem. Well, it really never was a problem since problems don't exist.... only solutions which are not found yet.
Saturday, December 22, 2007
Where has the panel gone?
Sunday, December 16, 2007
Most levers and dials
Another big piece....
Today I started the work on the flight engineers desk. There is a lot to do because the guys who disassembled (hacked apart) the cockpit were not very careful. A couple of parts have to be replaced or re-manufactured.
I'm glad that this part of the simulator will only be "cosmetic". It's not planned to make any of the instruments or controls work. Although I'm thinking to use some switches and lamps to control the computers or the simulator software.... we will see.
Thursday, December 13, 2007
Rust gone
Just like new...
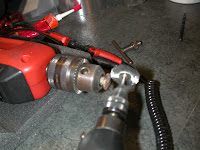
Some people asked me how I cleaned all the nuts and bolts and how I made them look like new.
I think the pictures speak for itself. Normally I use the lathe in my workshop to turn the screws and a bigger wire brush with an ordinary drilling machine. But today I had to clean only seven Airloc bolts and I did it with simpler tools. The result is the same but it takes a little bit longer.
I let the screw turn at a medium speed and move the rotating brush over the surface until it shines. There's not much you could do wrong. Just don't use a too hard brush and don't use too much pressure or you will cut grooves into the surface.
And that's the whole secret :-)
Monday, December 03, 2007
Something to look at
Friday, November 16, 2007
Reverse gear
Full reverse please....
This little board is responsible for good landings on short runways. It's the interface between the throttles, the reverser switches and the Simkits I/O adapter.
The problem was that real Connie thrust reverser don't work in the way it is needed for the flight simulator. If you pull the levers in the real airplane, then the propellers go into reverse pitch and the engine power is increased to approx. 30%. That means the propellers blow backwards and the throttles open up the more you pull the lever.
If you connect that directly to the flightsim you will get a problem. The simulator doesn't know if he has to reverse or accelerate, a movement of the throttles disables the reverse mode. The result is a wild switching between forward and reverse thrust if both commands are given simultaneously.
This little relais board does something simple. It disconnects the throttle potentiometers as soon the reverser switch is activated and the movement of the levers has no effect anymore. If you pull the levers, you will get that amount of reverse power as programmed in the flightsim.
Many thanks to the guys at mycockpit.org for helping me to solve this problem.
Saturday, November 03, 2007
Fake panels
Old and new faceplate...
The old faceplate from the ignition switch was a 'little bit' corroded. So I made a new one as described in the last post.
But how do you 'make' such a faceplate or label??? It's easy... really. If you have drawn a new plate on your computer (that's the difficult part), then print it on self adhesive paper with a good printer. If you need color, take a color printer.
To protect the paper and the printing on it, you only need some self adhesive transparent plastic sheet. Cut the label with the plastic on it into the right size.... that's it!
Sounds easy and with a little practice it really is.
Fonts needed
Another panel is functional...
Today I finished the work on the pilots overhead panel. From the many switches on that panel I will use only the engine ignition switches and maybe the command bell and the "no smoking" and "fasten seatbelts" switches... I only have to find a nice sounding bell.
The faceplate underneath the ignition switches was completely corroded and I had to replace it. I did it the easy way...
I scanned the original plate and used the picture as a background in Adobe Illustrator. Then I used that program to draw a new plate over the original picture. That way I was sure to have the correct dimensions and locations for the holes and letters.
The biggest problem was to find the right font for the words. I found that Copperplate Bold was very close. The only difference was that Copperplate had some little "spikes" on it's letters. But by chance I found a solution to get rid of the spikes. In Illustrator it is possible to define areas and borderlines of objects freely, also for letters. I used a thin borderline in the same color as the background and that line made the spikes invisible. Result... a perfect Super Connie panel font!
Sunday, October 14, 2007
USB trouble
My airplane....
... so far. After a couple of strange problems with my new USB hub, I took the old hub I used for my Mac and now all the stuff seems to work as intended. The new hub us now working under my desk and connects Mac, printer and scanner... here it works fine.
The problem was that some devices connected to the hub suddently stopped working. Plugging them out and in again cured the problem but.... other devices disappered instead. A very strange behaviour. Maybe it has to do with the USB device numbering, I don't know how the PC assigns the addresses to the USB devices... maybe it's something different.
However, there are no problems with the Keyspan 4 port hub so far.
Friday, October 12, 2007
Cheap interface
10 buttons for 19 Swiss Franks...
Do you need some buttons or switches hooked to your PC? Simply buy this little USB game controller for 19 Franks (about $15 ). It has 10 buttons, a hat switch and two miniature joysticks... and two vibration motors.
The second picture shows the PCB inside with everything removed except the connecting wires for the buttons and of course the microprocessor on the other side.
All switches have one ground connection and one signal connection, so it will be easy to attach all kind of flightsim switches. :-)
Metal worker
Cut, drilled, sanded....
The pilots instrument panel is finished - at least the metal work. Now the instruments have to be seated into the holes. Some of them will need some additional cutouts but more or less this is it.
It will be painted in black instead of the original army green because it looks better.
The pilots instrument panel is finished - at least the metal work. Now the instruments have to be seated into the holes. Some of them will need some additional cutouts but more or less this is it.
It will be painted in black instead of the original army green because it looks better.
Wednesday, October 10, 2007
It feels good...
Today I connected the Connie throttles to the USB analog input controller and after some playing with the settings and adjustments.... it really works.
It's a great feeling to push the throttles forward and to hear the roar of the engines from the speakers. The adjustment is a bit tricky because there are two locations where it must be done. First you do it in the settings of the MS-FlightSim, then again in the settings of FSUIPC. And don't forget to assign the axes to the correct joystick! If there are only two joystick devices (at the moment) it's easy, but if there are three and more devices, you have to concentrate on what you do :-)
I'm happy that it works because the TRC-Simkits analog input is designed for 10kOhm potis and I'm using 50k because I could not find the right ones. To correct the resistance I connected two 20k resistors in parallel to the potis, this gives a total resistance of about 15kOhm and that's fine.
The only disadvantage of this trick is that the travel of the throttles is not linear anymore. The response is a bit flat around the center position but that is no problem.
Sunday, October 07, 2007
Checking altimeters
I am playing a bit with the instruments... again. A few years ago I bought this vacuum chamber and a pump to seal some electronic parts, now there is a new use for it.
It seems the altimeters are still working good, despite my unqualified 'servicing'. Until 20'000 feet they go perfectly synchronous, above 25'000 they have a little difference of 300 ft. But I don't know to what altitude they are calibrated, so I assume that's more or less ok. They won't be used in an aircraft anyway.
By the way... did you know that on 20'000 ft there is only half the pressure than on the ground? It's a vacuum of -0.5 Bar (0.5 kgf per cm2... or 5N per cm2... or 500 hpa.... or 14.76 inches of Hg)
And you have a 80% vacuum at 40'000ft.
Friday, October 05, 2007
Amazing stuff
I don't know why I didn't start earlier to play with the instruments I got. Each one works in a completely different way and all of them are fascinating precision devices.
Yesterday I repaired the gyro heading indicator. The rotor of the gyro was stuck because of corrosion. The whole cockpit must have been standing in the rain or something. Everything shows more or less signs of water damage.
The heading indicator ist an amazing toy :-)... It makes a lot of noise since I'm not able to balance the rotor properly, but it works. It runs on 28 Volts DC so it's easy to hook on my lab power supply.
The most amazing instrument until now is the vertical speed meter. Not so much because of how it works but because it is installed inside an vacuum insulated glass jar (picture). I presume this has the function to prevent that thermal changes can alter the reading.
I already know what to do with this glass thing.... it will be a PERFECT tea cup! I already tested it with hot water from the tap. Outside it stays cool like it was empty. I just have to attach some kind of flat bottom to it.
Sunday, September 30, 2007
Synchros and RPM
How does an RPM indicator work?
In a car it is simple.
You only need a flexible shaft to connect a RPM meter to the engine. Inside the meter is a rotating magnet and a aluminum disc on a shaft with a return spring. The magnet spins and induces currents in the disc. These interact with the magnet and the disc begins to move... and so does the pointer.
And in an aircraft?
Well, at least in the Super Connie it is exactly the same principle with one difference. It is not possible to use a flexible shaft since the engines are 10 or more meters away from the cockpit. So they made something clever; they mounted a small generator on the engine and a even smaller electric motor inside the instrument. If the generator turns with 500 rpm for example, then the instrument motor does exactly the same.
And the rest is like in your car.... your old car... without electronic displays.
Saturday, September 29, 2007
Fire in the garage!
A very hot car!
In fact a little bit too hot for my taste.... it almost burnt down today! Just at noon when I was heating up my lunch in the microwave, my phone rang and my brother (he's a fireman) told me to look for my car because there was a fire in the garage where I parked it.
When I arrived there, the road was already blocked with firetrucks and hoses and police cars, firemen (and women) running around and the wole area smelled like burning plastic. Smoke came out of all openings of the garage.
I tought "well, there is not much to do at the moment" and I waited there and looked what's happening. About one hour later, when the firemen cleared up their equipment and the police had finished investigating, I was allowed to enter the garage for a look.
What can I say... everything was completely black. Even the light from the few remaining lamps on the ceiling seemed to be black. In fact the lamps have also been blackened by the huge amount of smoke.
What I saw was that my car was still there, on it's wheels and it seemed to be more or less ok. In fact it suffered amazingly little damage despite the fact that the fire was on the parking field directly next to it.
It was not a car that burned but some stuff from the janitor who stored his tools and stuff down there. I don't know how the fire started, that's what the police will try to find out now.
It took almost an hour to wash all the dirt from my car. There have also been some drops of molten plastic on it's backside. It must have been really hot there.
Well... it seems my car needs a new painting as you can see on the pictures and I need a good meal and some rest now. That was an exciting day...!
Thursday, September 27, 2007
Old tech goes digital
Interfacing the interface....
To drive the landing gear indicator and the unlock warning lamp, some reed relais and optocouplers are necessary. The simkits interface is able to drive only LEDs but I need 24 Volts for most of the original parts.
But this one was easy. The indicator has three wires, one common, one for "up" and one for "down". You just have to connect the 24 Volts to one of them and the corresponding sign will show up. If there is no signal at all... it shows the well known stripes.
The lamp socket has also three terminals. A common, a signal and one for the "push to test". You can push the red cap and the light will go on to test the bulb inside.
That's the good side of this old technology, everything is built simple and reliable.
Tuesday, September 25, 2007
Cheating with servos
The first original instrument is modified and "computerized". The frontal view is unchanged...
The same thing from behind. Almost everything is gone and an RC-car like servo is installed instead.
In fact it is not so differnt from the original design. The Mangenyns are replaced by servos but they have almost the same function, only the signals to drive them are different.
And yes... only one of the two pointers has survived. I glued the right and left pointer together because it makes not much sense in a simulator to show each side independently. In the simulator, the wing flaps always work on both sides, defects are not possible :-)
Thursday, September 20, 2007
Monday, September 17, 2007
Simkits
Yeppee...! The packet from Simkits has finally arrived. Friday I looked into the UPS website to check the tracking number and guess what... it was already delivered. Nice, but where? A unknown person has signed for the delivery shortly after noon. Who could that be...? Maybe someone of my new neighbours? I checked the online phone book and found the name, it's in the next house. Unfortunately there is nobody at home.
Two hours later I see the car of my neighbours coming. I ran over to ask them if they got my packet and yes... there it is.
Isn't that a bit strange ? Hardware for $2000 delivered to the wrong address without notice to me. If I had no internet access, how would I ever know? Well, everything went fine at the end . Thanks god I have a good relationship with my neighbours.
Two days later all the pointers are pointing correctly, the illumination is illuminating and I'm feeling a bit like at christmas.
Sunday, September 02, 2007
Pinching my finger
The reverse-lock actuator.
I'm still waiting for the Simkits packet, it should arrive next week. In the meantime I built the drive for the reverse lock. This motor will be installed inside the throttle pedestal and unlocks the reverser levers when the airplane is on ground.
While testing it, I pinched my finger between the lever and the bracket... and the motor jammed. I first had to reverse the power supply to release my finger. Ouch!
Friday, August 10, 2007
Mobile simulator
Wednesday, August 01, 2007
Flashback
678 rivets
I have cleaned up a little today and counted the rivets I have left... I used 678 pieces of 1000.
Nobody wants to know that but I'm writing it anyway :-)
Monday, July 30, 2007
Fresh paint
Saturday, July 28, 2007
Keep on rolling
This weekend I used up pounds of paint and I'm not finished yet. I begin to understand why they need tons of paint for a Jumbo Jet and why some airlines leave their planes mostly unpainted.
Looks not bad, right? I did not use an spray gun... everything is painted with a roller and that looks good enough for me. In fact, I have seen worse jobs made with spray guns.
Friday, July 27, 2007
Handles to move
Next job will be to attach some handles to move the sim.
Yesterday I used up two big cans of primer paint. The whole afternoon I have painted like a crazy. The cockpit appears now in a nice light gray and has finally the same color everywhere. (Picture coming soon)
Dulux Universal Primer is perfect for that job and works great on bare aluminum sheets without sanding.
Sunday, June 10, 2007
Nose job
Tuesday, April 24, 2007
Wrooom...
I really don't want to complain about the beautiful weather but it's bad for simulator builders. I have to ride my bike everyday and the sim work is waiting.
Last summer I bought this new toy, the red and white on the picture. Compared to my old Harley it's like a jet compared to a propliner. Now I have a bike for every mood.
For bike fans.... it's a Yamaha FZR1000 fron 1987 (without EXUP) and almost an oldtimer already with it's 80'000 km.
Thursday, April 05, 2007
Happy birthday!
Oh - Wow - Hello! I almost forgot the first birthday of my blog! One year ago I started the first post. Amazing how fast time is running.
HAPPY BIRTHDAY CONNIESIM-BLOG !!!
A door for pilots
Thursday, February 15, 2007
Intensive work
That's how it looked before...
And that's 2 1/2 months later.
The masterpiece is finished! I think I can say that without exaggeration. In no other part of the cockpit I invested so much time and work and I hope that will not be necessary anymore.
Sometimes I had some doubts if I really will finish that work. It's quite a mental thing and you need a lot of patience.
I painted many parts twice and triple because something went wrong. Acrylic paint on synthetic resin for example makes some funny things. Doesn't look good but it looks amazing when all the paint shrinks like the skin of an old apple.
You never stop learning....
Sometimes I wondered about the constructions of Lockheed. Many nuts are riveted to the metal and easy to drive a screw into, but others, especially on the most difficult places not. I don't know how they assembled that unit fifty years ago... I suspect that they must have had some very little workers, maybe four inches high, with at least five elbow joints on each arm.
Sunday, February 11, 2007
A new part is ready to be connected - the wing flaps lever. First I feared to have not enough space to install the four reed switches (magnetic switches) but during the disassembly I had the idea to simply glue them to the cover next to the lever. Then glueing a small magnet to the lever itself and finished is the job.
Well, it worked not that fast. I broke some of the tiny and fragile glass switches and had to repeat the process.
Today I installed the cover on the console again and it works very fine. The switches switch exactly at the moment when the lever locks into it's positions.
I still have to wire the gear switch andt the whole trottle pedestal is finished. Maybe also the auto pilot... maybe not, we will see. I think it makes not much sense to let the computer fly alone. But future will show it. I can add that feature later if I want.
Wednesday, February 07, 2007
Sunday, February 04, 2007
Rats in the cockpit... Snakes on a plane? No, no, not a Hollywood phantasy product, just a landing gear knob with some teeth marks. I first thought that this may have come from some careless pilots scratching it with his shoes. But after a closer look I saw that it must have been a little animal like a rat or a Guinea Pig. Do they live in the Dominican Republic? Maybe... Or tiny little midget leopards.
That explains why the landing gear lever smelled penetrantly like shit when I sanded it. I first thought it was some strange sort of paint but....
What a shitty blog entry today.
That explains why the landing gear lever smelled penetrantly like shit when I sanded it. I first thought it was some strange sort of paint but....
What a shitty blog entry today.
Friday, January 26, 2007
There is some friction.... The throttle feeling is already perfect because I mounted the friction rollers. Aluminum discs and leather, pressed together by a spring. Why leather? Because the first cars had brake pads made of leather and I had nothing better in my workshop. And it works wonderfully. The potentiometers are still missing and178 other parts until the throttle console is finished.
Yesterday I put a new gear wheel into the elevator trim indicator (the disc with the numbers) and now this works too. Ba chance I had a suitable gear in my collection. The only problem was to turn the round hole in the middle into a hexagonal one. But with some time and a file even that is possible.
Sunday, January 14, 2007
Master and slave.... The one is a dual core Pentium 4 with 3 GHz. The other a Pentium 3 with 700 MHz. I admit these are quite unequal twins but each one fits to its purpose. The faster runs the Microsoft flight simulator, the slower some additional software for the instruments.
Thanks to WideFS both can communicate with eachother. Today I installed the Instructor Station demo from Project Magenta to test the link between the two. I think I will buy the full version because the software is great! You can play God with it... engine failure? Here it is... just click a button.
Tuesday, January 09, 2007
And there is always one who is crazier than yourself...!
To restore a cockpit is already a rather crazy idea and sometimes people are looking strange if you tell them about your hobby. But while surfing the internet you find even stranger people from time to time.
The picture shows the cockpit collection of Roy Jerman, a member of the "International Cockpit Club", located in England. Most members have a single cockpit or only a instrument panel... but not Roy.
"Do it right or do it not!"
Subscribe to:
Posts (Atom)